How to Apply for a Schengen Visa: Complete Guide
Are you still wondering how to apply for a Schengen visa? Don’t worry; we’ve got you covered. First, read the important information section before starting your visa application. Next, proceed with your application carefully. Once completed, click here to book your appointment.
A Schengen visa is a short-stay visa that allows travel within the Schengen area, which includes 26 countries with no internal border controls. Before applying, check if you need a visa or permit for Europe. You must apply from a Schengen country. This blog focuses on applying for a Schengen visa through the French embassy.
Disclaimer: The information on this website is for general informational purposes only. Click here to read the full disclaimer.
Apply Step by Step
Step 1: First, go to the Official Visa Website for France and click on My Account.
Step 2: Next, if you already have an account, enter your credentials and click on sign-in options. Otherwise, create a new account by entering your basic details.
Step 3: Then, after clicking on create an account, a confirmation email will be sent to your provided email address. Open your email inbox and click the verification link.
Step 4: After clicking the verification link, you will be redirected to the official Visa Website for France. Here, the Email verification code field will be pre-filled. Simply click the Verify button to proceed.
Step 5: After clicking the Verify button, you will be redirected to the homepage. Then, click on the Create a new request in a new group button.
Step 6: Next, start filling in your information accurately. The first step is to enter your nationality.
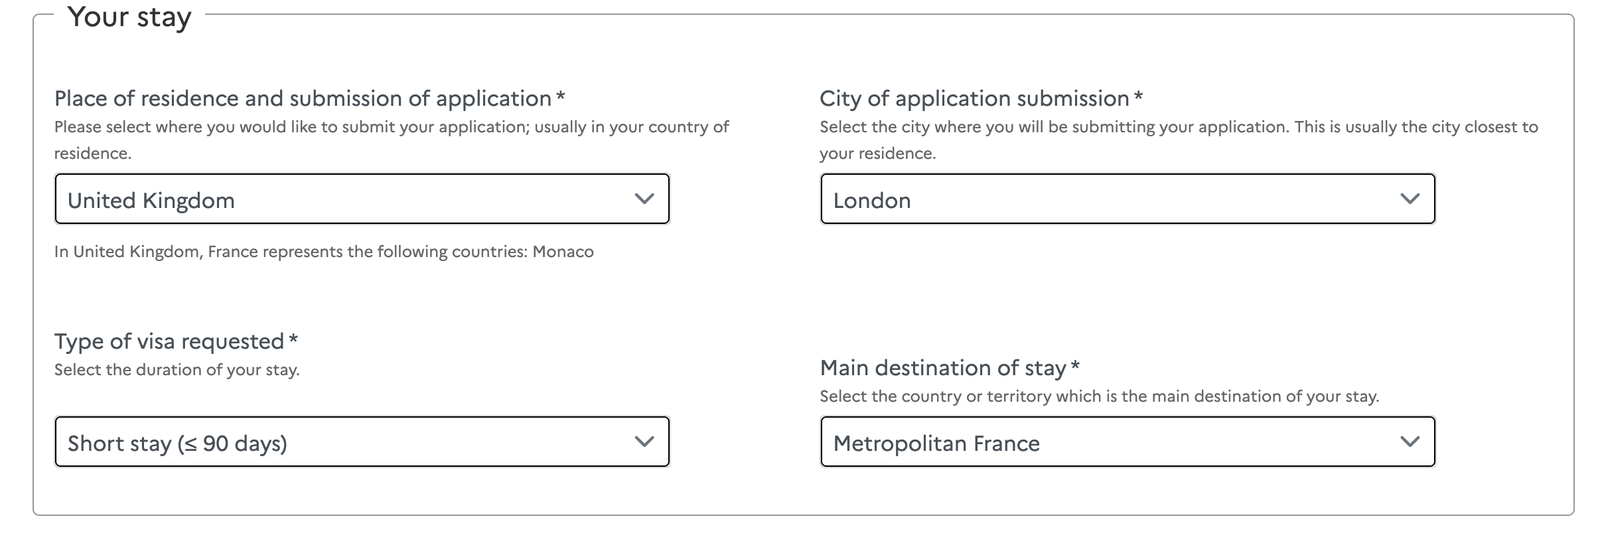
Step 7: Then, enter your stay details as shown in the image below, if you are applying from London. Otherwise, select your nearest destination. Fill in your passport details under the travel document section. Finally, choose tourism from the Your plan dropdown menu. Click Verify to proceed.
Step 8: After clicking Check, the system will tell you if you need a visa. If you see a similar notification, click the Next button. Then, click Yes on the pop-up only if all your details are correct.

Step 9: Carefully fill in all mandatory information in the Your Information section and other applicable fields.
Step 10: Click Next and select the correct option for your Last Visa section. Then, click Next again and enter details about your stay, including your planned arrival and departure dates in the Schengen area.
Note: The image below is for reference only. Enter your details according to your plan. If you plan to visit another Schengen member state, select Yes and provide the required information. Finally, click Next.

Step 11:
Next, enter your information about accommodation. If you select the hotel option, enter the hotel’s accurate details. I recommend booking a free cancellation hotel unless your visa appointment date is confirmed. Then, select the checkbox for who will cover your travel funds. Choose “Myself” if you will show your bank statement and tick the details for means of subsistence. Also, check the prepaid option for accommodation and transportation costs, and book them before your appointment. Alternatively, if someone else pays, select the “By guarantor” option, provide their name, and tick applicable checkboxes like all expenses covered during the stay. If your guarantor is your spouse, carry a copy of your marriage certificate on the appointment day.
Step 12:
After that, click Next and carefully note all required documents for the visa application centre. Then, click Next again. You will be directed to the My Request page, where your recently created application will appear as validated, as shown in the image below.
Finally, if you want to apply for another member, do not click the I declare checkbox. Instead, click Add a request, enter their details, and click Continue.
Step 13:
Then, you will be navigated to the first page to enter valid details for the additional applicant. On the My Request page, both applications will be listed. If you want to add another application, repeat the previous steps. Otherwise, click the checkbox and press the Pursue button. Next, the visa application fees (€80 per application) will be displayed. After that, click Next.
Step 14:
Next, make an appointment at the visa centre. Carefully read this section, then click the checkbox. After that, click the Send to a visa centre button. When a dialog box appears, click Yes to generate your application form as a PDF. Please carry this document on your appointment day. Finally, schedule your appointment with the respective visa centre. For London applicants, this is TLS Contact.
Note: Please read the Important Information section for more details.
Hello
Welcome to Aesthetic Passports, a dedicated platform for travel, adventure and unforgettable stays

Let’s explore the world through our lenses and the words of the storytellers
Useful Information! Thank you for sharing
This is what I was looking for.. Thank you for detailed information.
Hi,
I’m filling application for visa. In your information it’s asking for your job details, do we really need to provide the job details ?
It would be very helpful if you Kindly reply to my query.
Thanks,
Manasa C
Very detailed and helpful!